Basic chest harness bondage tutorial


articles and tutorials shibari and Japanese Bondage Shibari rope bondage
The Basic Chest Harness is the framework from which many other chest harnesses are modeled. Some harnesses will have more wraps, cinch in different ways, use different materials or knotting, but they have similar origins. You might be surprised at how simple some sexy images you saw will now be once you can reverse-engineer them with this tie in mind.
Try experimenting once you have played around with this harness. The same tie done in jute will not look or feel the same as tying it in MFP or polyester. See what the tie feels like when the Bottom took a deep breath before being bound as compared to having let all of their breath out. You can learn a lot about each other’s desires and bodies by doing such exercises.
This tie was done with a single 30ft (10 meter) length of 6mm jute. However, everyone’s body is a different size and shape. For larger frames you may need up to 100ft (30 meters).
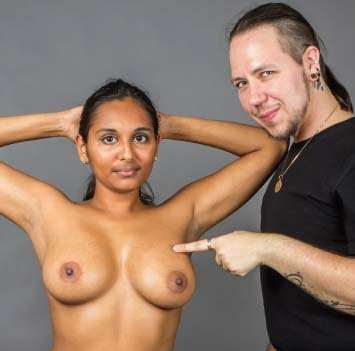
Identify chest
Choose a chest. Identify anything you might need to be aware of, such as breast implants, sensitive nipples, fresh tattoos or piercings, rashes or body hair. Some of these may require minor modifications, such as reducing extreme pressure on breast implants, or pulling rope carefully over body hair.
Find your rope
Almost any sort of rope is usable for a chest harness; choose one that you enjoy.
If you run out, adding rope is always an option. If you have too much, you can add decorative details, clavicle exposure, or wrist restraints with the extra line.
Find the bight
Fold your rope in half. Do whatever menacing or silly thing you like to do as you check the rope for knots, debris, splinters and burn speed. Then, hold the rope by the bight.
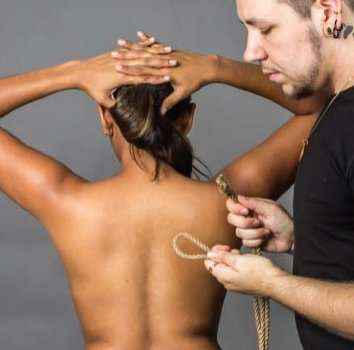
Wrap torso under breasts
With the bight located just to one side of the spine, wrap the folded line around the torso with the ropes just under the breasts. On individuals without breasts, wrap the line a few inches under the nipples, gauging by the line of the pectoral mass.
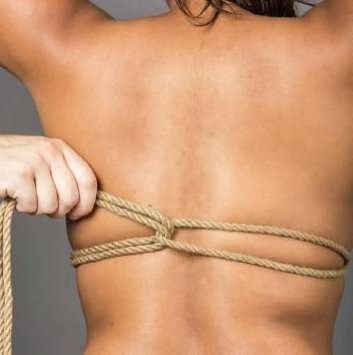
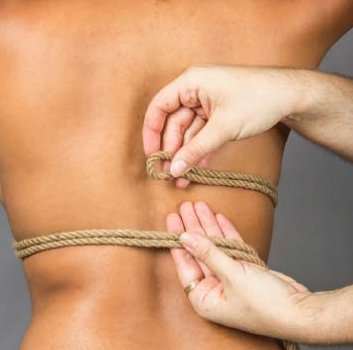
Create lark’s head
Pull the ends through the bight, then pull the ends back in the direction that they came from, placing reverse tension on the lines. The lines around the torso should be snug but not restrictive.
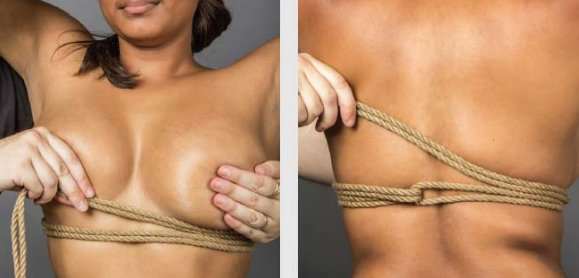
Wrap a second time under breasts
Lay the second set of lines above the first set, just underneath the breasts. You may need to carefully lift the breasts to keep any skin from catching.
Create second lark’s head
When you come back to the first lark’s head, you will see that by wrapping a second time, you have created a new loop that rope can be tucked through. Pull the ends through this loop, then pull up and back in the direction the line came from, creating reverse tension.

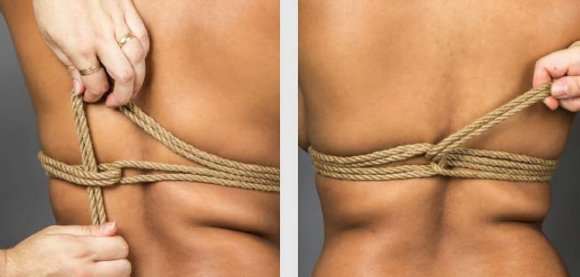
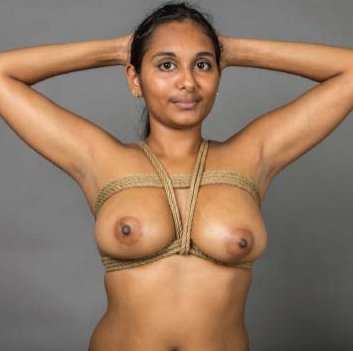
Repeat above breasts
Wrap just above the breast. Tuck ends through the newest loop and pull in the direction the line came from.
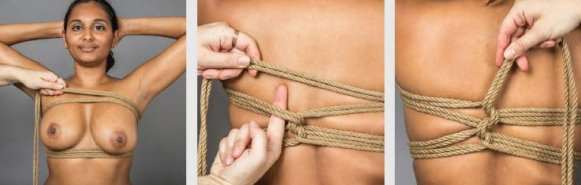
Repeat above wraps
Wrap a fourth time, just above the third wrap, and tuck the ends through the newest loop and pull in the direction that line came from.
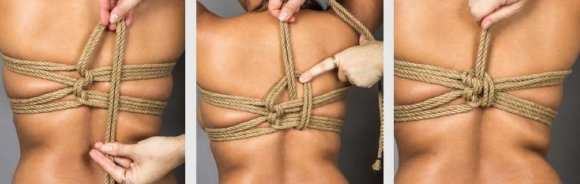
Tie off wraps
Hold the rope 2 inches (5 cm) above the chest harness using your right hand and let the ends drop down. Take the loose ends and tuck them up under all of the wraps of the chest harness, pulling the ends through the loop that was just created. Pull the half hitch you have just created tight.
Over shoulder and under lower wraps
Choose a shoulder, any shoulder. In my example, I chose the right shoulder. Tuck the ends underneath the two sets of lower wraps and pull the lines through.
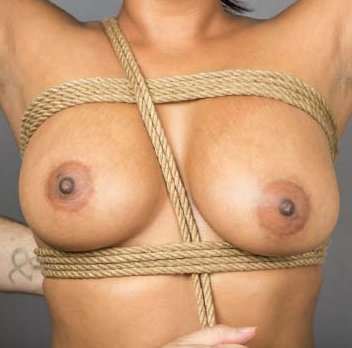
Bring ends up over the other shoulder
In this example, this would be the left shoulder.
Pull ends under all wraps
Tuck the ends underneath all four sets of wraps and pull through.
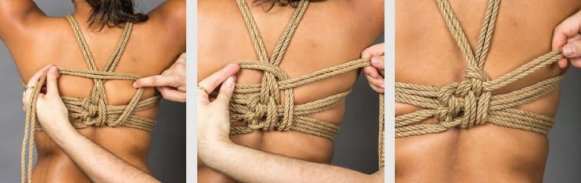
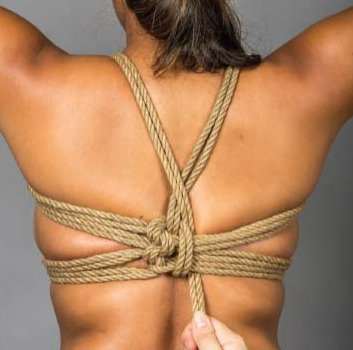
Tie off shoulder straps
Hold the rope above the chest harness in your right hand and pull the line over with your left hand. Take the loose ends and tuck them underneath both shoulder straps with your left hand, pulling the ends through the loop created with your right hand. Pull the half hitch tight. At this point, your chest harness is finished, but step 15 is included as an idea of what to do with extra rope.
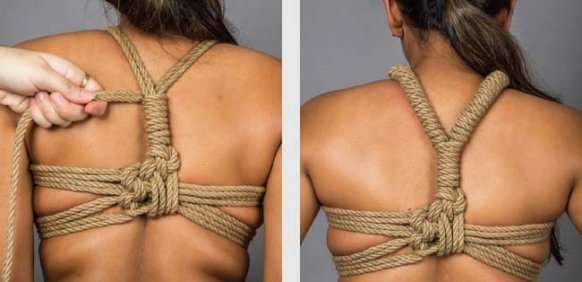
Wrap a whole lot
Take the ends and wrap them around both shoulder straps, then split the lines apart and wrap each line around a different shoulder strap. Other options include wrapping around some of the chest wraps, wrapping around a mixture of chest wraps and shoulder straps or exploring a variety of artistic knotwork.