Japanese Pearl Harness - bondage tutorial


articles and tutorials Basic Bondage Harnesses, breast bondage tutorial
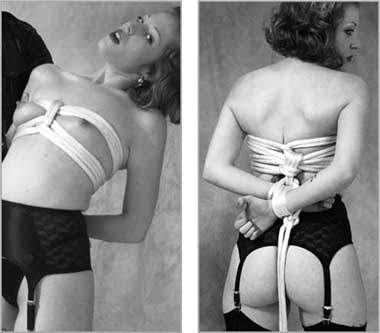
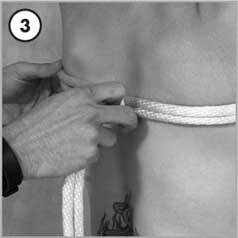
This piece is our modification of a traditional Shibari-style Japanese chest harness. Usually this harness would wrap around the arms as well as the chest, but we like to save binding the arms for after the torso piece is complete. This style is named “Pearl” because the pinching of the breasts between the ropes resembles a pair of pearls. If you find before you a pair of pearls as perfect as these, you’d be quite the lucky one indeed!
Rope length: 30 to 50 feet
Rope diameter: 3/8 inch to 7/16 inch
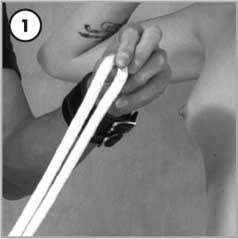
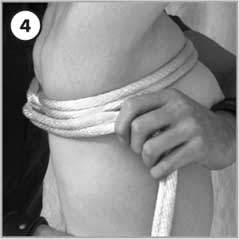
Start with a bight in the very middle of your rope.
Wrap the pair of ropes above the breast line, bringing the bight around to the center of the back.
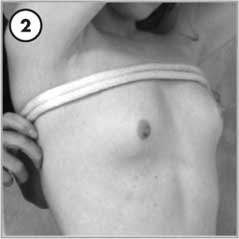
Pull the ropes all the way through this bight. Keep the bight centered on the spine.
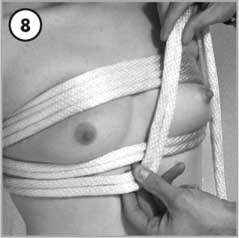
Adjust the tension to make the wrap firm (but not uncomfortably tight). Double back the ropes, wrapping them back around to the front of the torso.
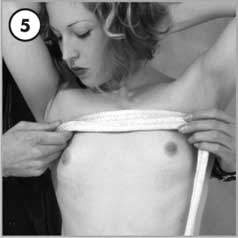
Layer these ropes in a line right below the previously wrapped row, keeping them flat against the skin and up next to the row above them.
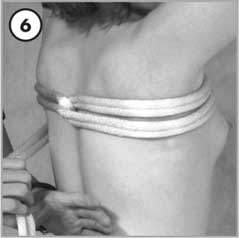
Keeping tension firm and consistent, continue wrapping these ropes around the back.
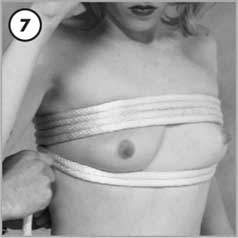
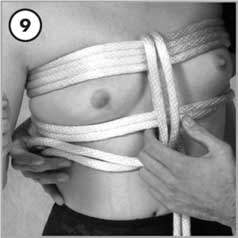
Wrap these ropes all the way around the front, this time in a row beneath the breast line. Continue wrapping around the back and bring them to the front, beneath the previous wrap.
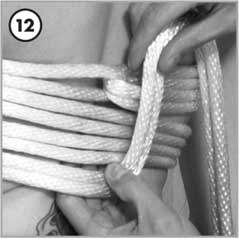
At the front, hold the bottom row of ropes with your thumb and make a backward L to bring the ropes up over the top rows.
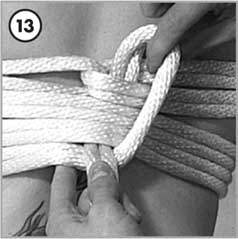
Pass these ropes over the top rows and back down behind them. Maintain the L shape at the bottom, while sliding or adjusting all the ropes to remove any slack.
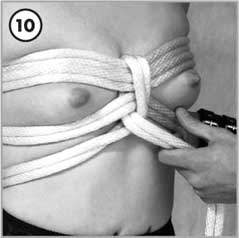
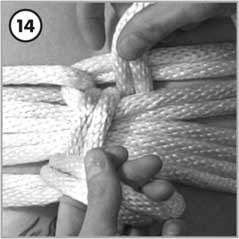
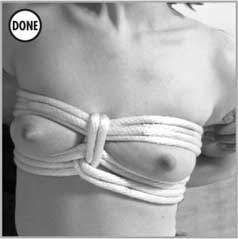
Now pull the ropes out front through the corner of the L. As you pull the ropes, the top and bottom rows will pinch together, squeezing the breasts firmly, like pearls.
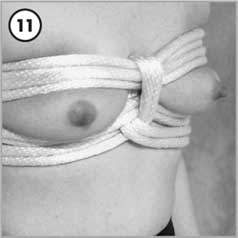


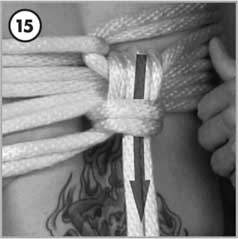
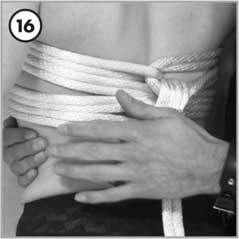
Adjust the ropes to keep the rows together and tight around the torso as you bring the ropes to the back.
In the back, make an L with the bottom ropes, just like you did in the front. Bring the ropes up to the top row at a right angle, up to the bight.
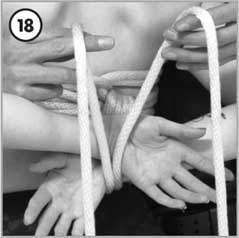
Feed the ropes down through the opening in the double-bight. Pull them down behind all the ropes (except the bottom row) and out through the corner of the L row.
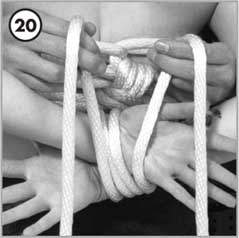
Crossing the L to the right, now feed the ropes up behind all the rows and out through the inside of the double-bight at the top (between the first and second rows).
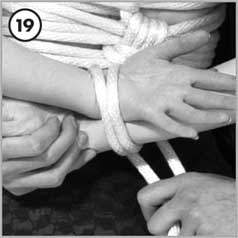
Finally, feed the ropes down through the opening made when you crossed the L to the right. Pull the ropes all the way through and tighten this knot securely.
Carefully adjust all the rows so they are neatly together without gaps and uniformly tight around the torso. The torso portion is done!
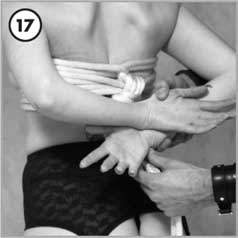
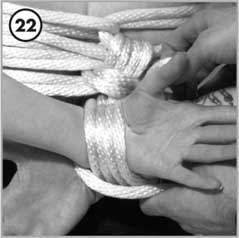
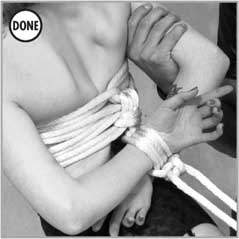
To tie the arms, cross both wrists behind the back, atop both the ropes.
Bring the ropes up and over the wrists and down behind them, with each rope on its own side of the center ropes.
Adjust the arms so that the ropes are below the wrist joint and not riding up onto the palms.
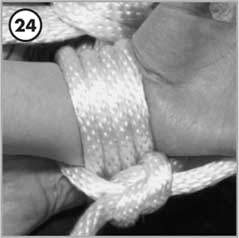
Wrap the ropes over the wrists again and down the back, one rope on each side of the center ropes.

Tie an overhand knot between the wrists and the back.
Have your partner bend the wrists to open a space between the wrists and arms. Then bring one rope on each side up and over and down between each wrist and arm.

Finish securing the wrists by tying a Square Knot below the wrists.
Now everything is done but the fun!
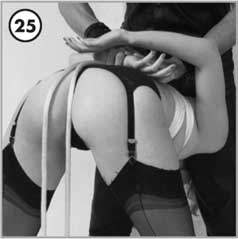
For tying the arms in a more Dominant way, we like to bend our partners and place their heads between our legs and tie the wrists as shown above (but upside down).
This is a great piece for controlling your partner…
and for stimulating the breasts.
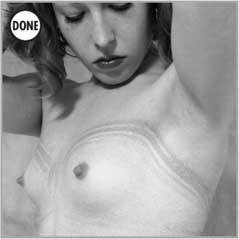
The Pearl Harness always seems to leave quite an impression (on the skin and in the mind).