Clavicle Exposed Chest Harness | shibari tutorial


articles and tutorials shibari and Japanese Bondage Shibari rope bondage
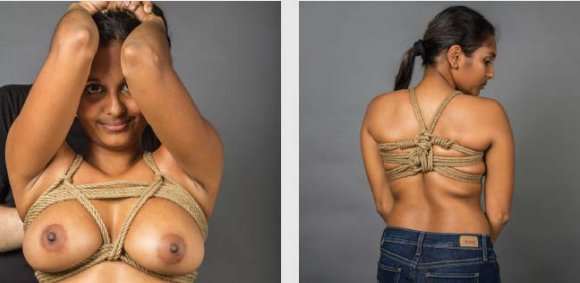
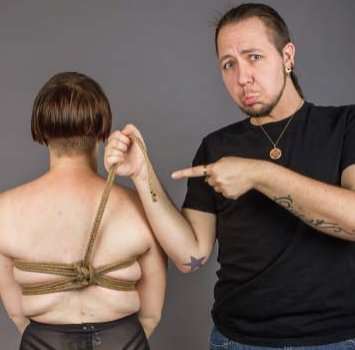
Having shoulder straps go directly across the collarbone—the clavicle—can be uncomfortable for some Bottoms. This harness provides a quick and easy fix for this challenge. Once you learn how to do this variation, you can start playing with other ways to move your ropes around.
If this tie takes the shoulder strap and pulls it towards the shoulders, consider what direction you would need to pull from for other modifications to take place. You can pull the upper chest lines up by having the available lines go over the shoulder, catch the upper lines, and then return to the back of the body for example. Play around!
Follow steps 1-14 of the Basic Chest Harness.
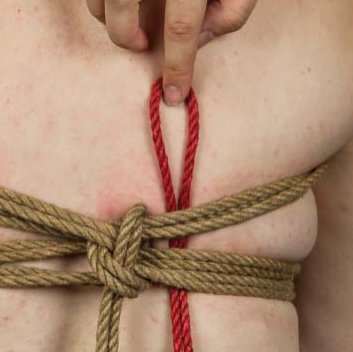
Split the lines
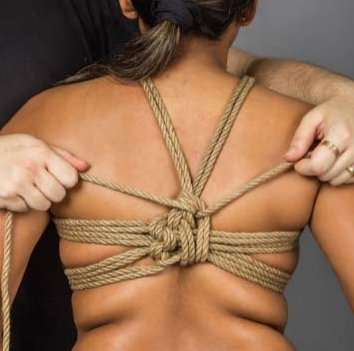
Once the lines from the shoulder straps are tied off with a half hitch, have one line run to the left and one to the right, above the four sets of wraps that went around the torso.
Pull ends underneath shoulder straps
Having gone underneath the left armpit, pull the left rope ends underneath the left shoulder strap, then pull it back in the direction it came from. The goal is to pull the shoulder strap off of the collarbone and reduce tension on the upper front of the chest. Repeat on the right side.
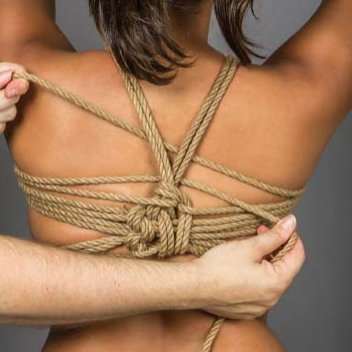
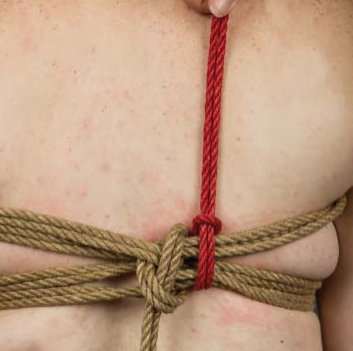
Return to back and go under shoulder straps
Tuck the end of the left line under both shoulder straps, passing over to the right side. Repeat with the other line. Tension on both ropes should be even, with symmetrical clavicle pulling on the front of chest.
Tie a square knot
Take each line and use them to tie a square knot.
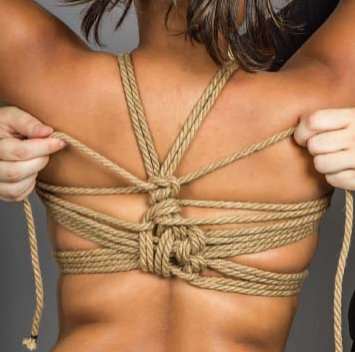
Wrap a whole lot
Take the ends and wrap them around the lines from the clavicle pull. Other options include wrapping around the chest wraps, around a mixture of chest wraps and shoulder straps, going around shoulder straps, or using knotwork that expresses your artistic vision.
Adding Rope Option 1:
Overhand with Lark’s Head
We’ve run out of rope! What are we supposed to do?
No fear! We can always add on extra rope.
Running out of rope is a very common occurrence, and there is nothing wrong with it happening from time to time. If you think you need three pieces of rope for a scene, have four or five with you. It allows for when you happen to mismeasure, when a rope tangles, or if you come up with a new idea.
Taking a moment to add on new ropes is also a great chance to pause and touch your partner, reminding them that you know there is a person inside all of that rope. Sometimes Tops can get so fixated on getting the bondage “right.” These natural pauses allow for an opportunity to reconnect.
Well... let’s start with that rope that we’re holding already, shall we?
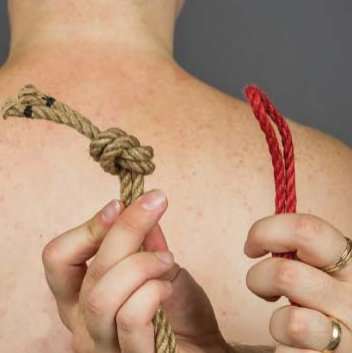
Find the bight on the second rope
Tie a single overhand knot near the ends of the lines you are already working with. If the second rope you are adding is significantly larger in diameter, tie two overhand knots on top of one another.
Find a second rope, and fold that rope in half.
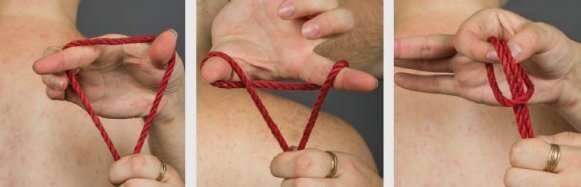
Make a lark’s head in second rope
Place your thumb and index finger inside the bight of the second rope. Spread your thumb and index finger apart. Rotate your hand so that your fingers are now facing down and the doubled line is between your thumb and index finger. Bring your thumb and index finger together, sliding both loops onto your index finger and middle finger. This creates the lark’s head.
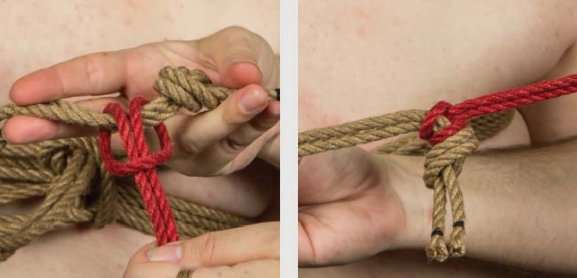
Slide lark’s head over overhand knot
Grab the overhand knot between your index finger and middle finger and slide the lark’s head over the overhand knot. Tighten the lark’s head down. You now have a longer rope!
Adding Rope Option 2:
Lark’s Head to Main Body
There are times when continuing off of the rope you have been working with is not desired. Perhaps the lines you were working with ended up being tied to one another. Maybe you want to pick up tying somewhere in a different part of the bondage, beginning at the front of the tie rather than on the back for example.
You might also want to use this specific technique because it lays very flat across the body, and can be tied around one segment of rope, or many. Try playing with both of these techniques for adding rope to see which one works best for you in which situations. Varieties of technique allow for more combinations as you evolve in your rope knowledge.
Slide bight under wraps
Choose a second rope and hold the rope by the bight. Slide this folded line under all of the chest wraps, or just a few—whatever works best for the given situation.
Pull ends through bight
By pulling the ends through the bight and snugging down, you create a lark’s head. You are now free to keep going.