Basic Wrap - bondage tutorial


articles and tutorials Basic Bondage Rope cuffs and bondage restraints
One of the most useful bondage techniques is this Basic Wrap. Use it wrist-to-wrist, ankle-to-ankle, wrist-to-ankle, or even to secure an arm or ankle to the leg of a table or chair. It doesn’t have to be rock-hard tight to hold, and it can even be loosened midscene without freeing your partner, so it’s a more circulation-friendly technique to use even in long-duration play.
Rope length: 25 to 40 feet
Rope diameter: 3/8 inch to 1/2 inch
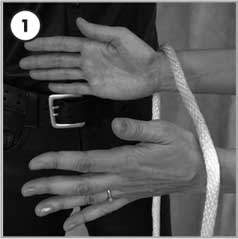
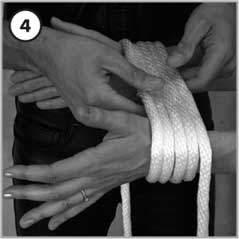
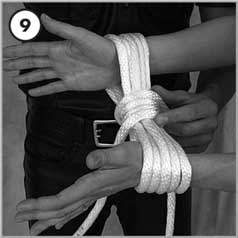
Start with the wrists apart, about two fist distances (or “fistances”) wide. Lay the very middle of the rope atop both wrists.
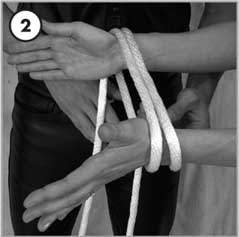
Wrap one end of the rope two times around both arms, toward the elbows.
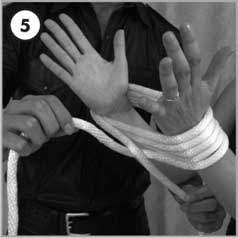
Wrap the other end of the rope two times toward the hands. (If you’re using thinner rope, wrap more times in each direction, to distribute the pressure over a wider area.
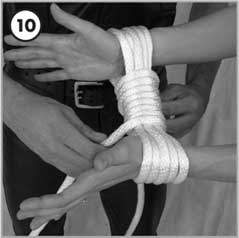
All the ropes should lie parallel and flat against the skin. None should cross. Otherwise, all the force would press against the wrist at one point, where the rope rolled.
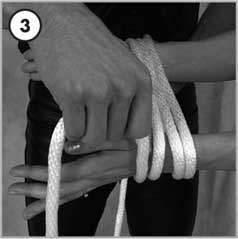
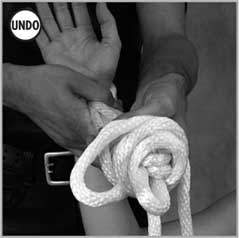
At the bottom, cross the “front side” rope with the “back side” rope, like you’re tying ribbon around a package.
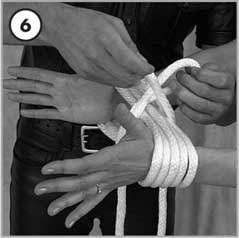
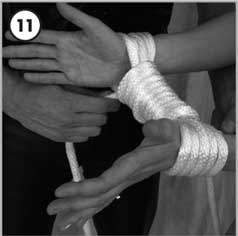
Pull both ends of the rope all the way around the wrist wrappings.

One end of the rope should now hang to the front (the hands), and one to the back (the elbows).
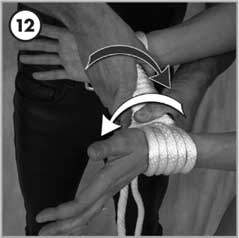
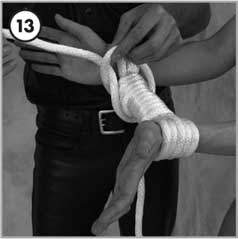
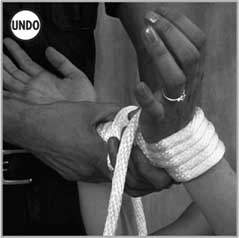
Now, tighten down the wraps. Working from the middle, you’ll begin to wind each end of the rope toward the wrist.


Wind one end of the rope around the wrapping, all the way to the wrist. (Be careful not to let the middle creep toward the other wrist.)
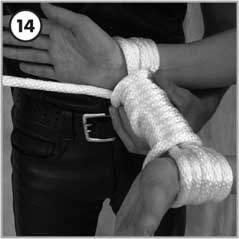
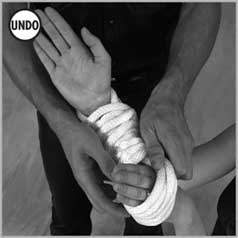
Now winding in the opposite direction, wrap the other rope toward the other wrist. (Bunching up the rope in your hand and unraveling as you wind helps you wrap faster.)
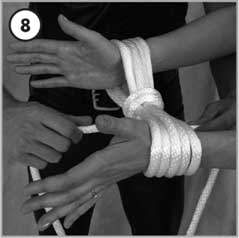
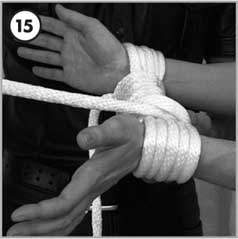
As with the first wrapping, none of the ropes should cross. To protect circulation, be sure you can fit one finger between the inside wrist and the winding.
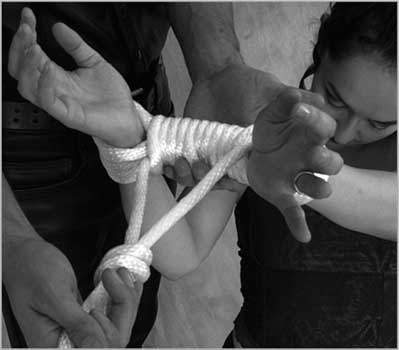
Tighten the piece by twisting the wrap, with each hand turning in the opposite direction. (Reverse the twist direction to loosen.) Add more winds if needed.
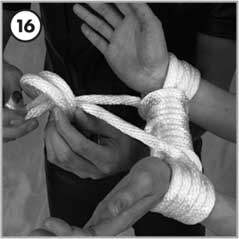
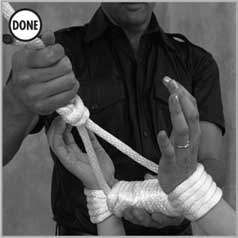
To secure the ends, lift the last loop of the winding and pass the end of the rope from the inside to the outside.
Tighten this down, being sure to maintain a finger space between the wrap and the wrist.
Secure the other wrist the same way. You’ll notice that one end of the rope exits the wrap on the top, the other on the bottom. This is correct.
You can either use the loose ends to tie off one at a time, or you can tie both ropes together in a double overhand knot, like we’ve shown here.
This triangle-shaped tie-off can be held up with the ends passing though an overhead eyebolt, or simply used to lead your partner around.
To loosen or undo the piece, simply twist both sides of the winding in opposite directions. (As before, twisting one way will tighten, the other way will loosen.)
Keep twisting to loosen the wrap as much as possible. Then slide the loose wrap all the way toward one wrist to open the opposite cuff, and slide the hand free.
Now slide the loose wrap all the way off the empty end to free the other hand. Amazingly, the empty rope will be left without any tangles, just two loose overhand knots.