Basic Two-Column Tie - Japanese-style rope bondage tutorial


articles and tutorials shibari and Japanese Bondage Traditional Japanese rope bondage
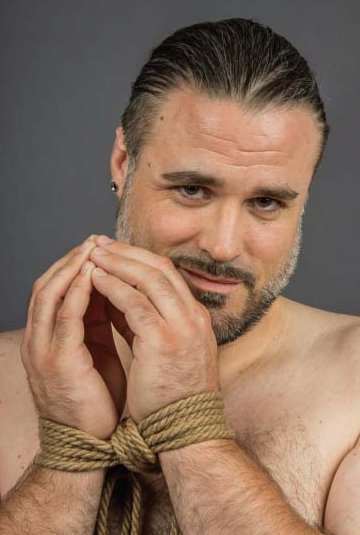
This incredibly versatile tie is one of the most used in Japanese-style rope bondage. It goes by many names: rope handcuffs; Niwatori (little chicken— when used to tie a wrist to an upper arm); and Kani (crab—when used to tie an ankle to a thigh
Sit down and brainstorm how many columns there are that might be tied. Some will pair up easily by looking at the body symmetrically. Wrist to wrist, ankle to ankle, or even thumb to thumb using Para-Cord. Some require looking at the body asymmetrically, such as binding the wrist to the opposite ankle. Others will go outside the body of one person, attaching one individual to another or tying an ankle to a chair.
As you are practicing new ties, consider doing so outside of the context of a scene or kinky encounter. Grab a piece of rope and try tying your own ankles together. You will gain familiarity with what the rope feels like on someone’s skin, as well as how tight you can comfortably pull down on the lines. By having experience before getting into the heat of the moment, you can be more confident and provide a safer experience for your partner.
For some people, the best way to get the information on how to do a tie is based in repetition. By having your hands do the same movements over and over, you gain “muscle memory,” where you become able to have your body go on automatic once you start on a technique. Try tying while watching television, hanging out around the house, or when relaxing before bed.
But be forewarned! Don’t just practice tying two-column ties as wrist to wrist. Why? Because a mind that has been trained to go on automatic will get confused if you turn it all sideways and try to tie the wrist to the upper arm. If you have done nothing but the wrist to wrist hundreds of times, your body might forget how versatile this technique truly is. Practice—but remember to keep your flexibility as well.
Tutorial
The Basic Two-Column Tie can be used on a wide variety of columns. The columns need to be parallel to one another, but don’t need to be the same width or even be human limbs. The goal of this tie is to lash the columns to one another, maintaining the amount of distance between them. Thus, you can choose two wrists, a wrist and an upper arm, an ankle and a chair leg, as long as the columns have even pressure applied and get locked in place.
When thinking about tying things other than wrists or ankles, consider how snug the space between columns will be. Practice being gentle when learning the Two-Column Tie, so that when you get to binding a thigh to an ankle, you will know how not to pinch or burn more delicate skin. You can always bind more firmly once you get the hang of it.
To tie around the two wrists shown, a 10-15ft (3-5 meter) piece of 6mm jute is shown.
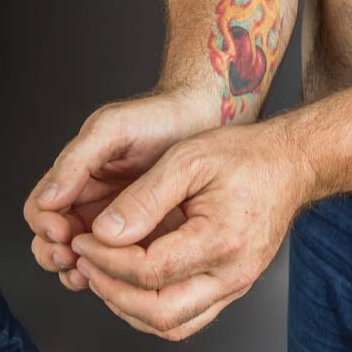
Identify columns
Choose two columns. Identify anything you need to avoid, such as joints or the front of the neck. Make sure to turn the insides of wrists towards each other to protect the arteries, veins and nerves that run dose to the surface of the skin.
Find your rope
Choose what sort and how much rope you want to use for the tie. If you are tying a pair of thighs together or someone’s waist to a tree, you may need a longer piece, 25-30ft (8-10 meters).

Find the bight
Fold your rope in half and hold the rope by the bight.
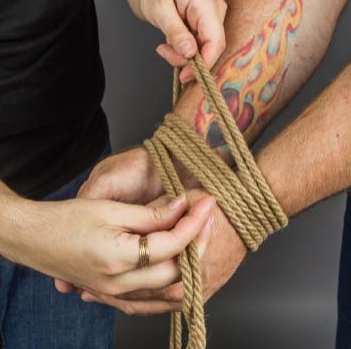
Wrap columns
Wrap the line around both columns with just enough tension to keep the rope from moving. Make sure the columns are not touching one another; they should be anywhere from 1-3 inches (3-7 cm) apart. Wrap the columns three or four times (three wraps are shown in the example) evenly distributing pressure on the columns. When wrapped, the rope will resemble the letter “N” or “Z” with the short/bight end having an 8-12 inch (20-30 cm) tail.
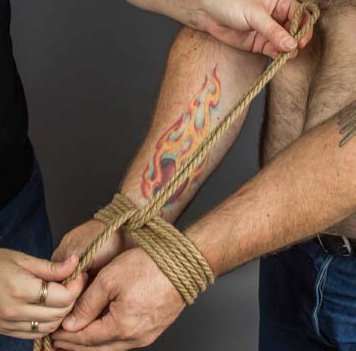
Twist the bight and ends
In a wrist tie, if the bight end was near the hand, it will now be pointing towards the elbow.
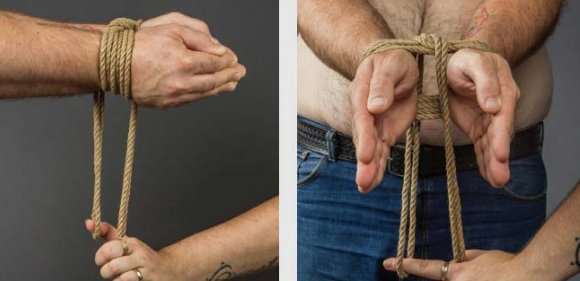
Drop the bight and the ends between the columns
After twisting the bight and ends, bring both the bight and the ends down between the columns.
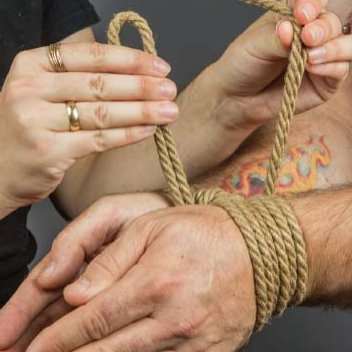
Pull the bight and the ends back up between the columns
If the bight was dropped down near the elbows, pull it back up between the wrists, and vice versa. Make sure the lines lay flat on the opposite side of the wraps from the knot.
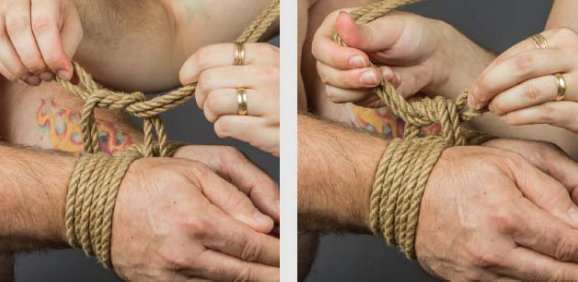
Tie a square knot
Pull the lines between the columns snug, cinching the columns together. Using the bight as one “end” of and the loose ends as the other “end,” tie left over right, and then right over left. A finished square knot will resemble the number 8 if viewed from the side. If you are using a slippery line like nylon or MFP, feel free to add a hitch on top of the square knot.
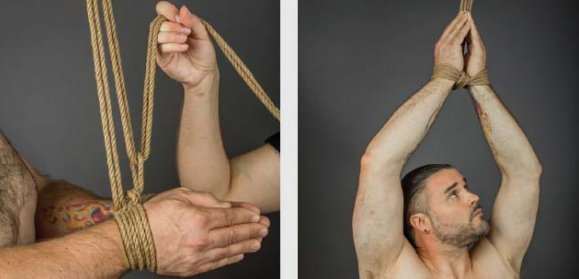
As with a One-Column Tie, the loop formed by the bight can be used to create a pulley or to tie other lines to, such as running the ends through an overhead point and then back down to the bight loop, and up again. This is perfect for pulling hands above the head, or tethering to a piece of furniture, as long as the overhead point or furniture can take an appropriate amount of strain for what it is holding.

