Variation: spread two-column tie tutorial


articles and tutorials shibari and Japanese Bondage Rope cuffs and bondage restraints
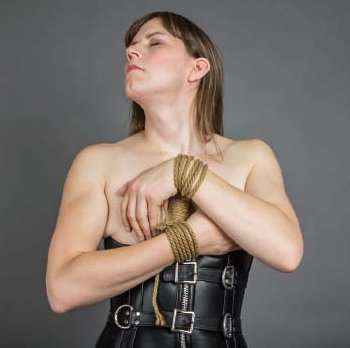
There are times when the two columns you want to bind won’t quite touch. This variation is great for when an ankle can’t reach the thigh, or a pair of wrists don’t snug up to one another. The Spread Two-Column Tie is also a great choice for purposefully having space between wrists by creating a spreader-bar out of nothing but rope. Some individuals prefer this modification not out of necessity, but out of aesthetics and flexibility of movement. The ability to move around allows for Bottoms to assist in taking care of their own health needs while also letting them writhe around seductively. Extra wraps between wrists can lay over breasts framing them, or at the top of the ass framing it nicely. All of those wraps also means more rope marks, which can be a turn-on for some folks.
To tie around the two wrists shown, a 10-15ft (3-5 meter) piece of 6mm jute is shown.
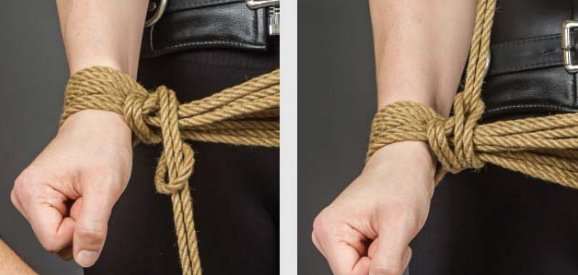
Follow steps 1-4 for Two-Column Tie.
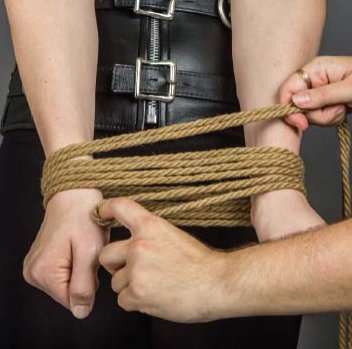
Start with the columns at 4-10 inches (10-25 cm) apart before you begin wrapping the columns.
Twist the bight and ends
For a pair of wrists, if the bight end was near the hand, it will now be pointing towards the elbow.
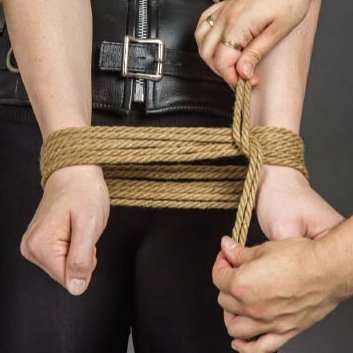
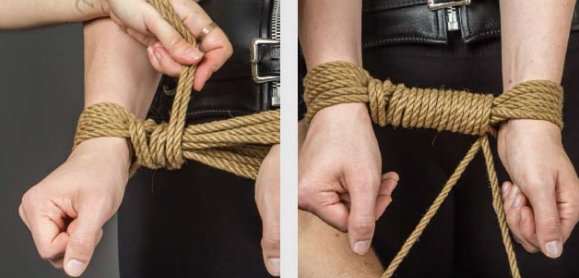
Begin wrapping the bight and ends around the wraps
Wrap the lines in opposing directions, cinching the wraps together as you go. Keep going until you are almost out of rope on the bight end.
Pull the ends through the bight
Take the ends of the rope and pull them through the bight. Then pull the ends in the direction that pulls the bight tight and keeps tension on the line. If you don’t, everything you have tied so far will loosen up. This form of tension on the line is referred to as “reverse tension.”
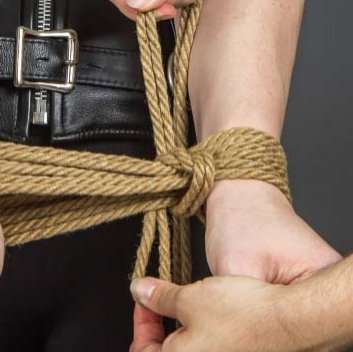
Wrap the line around the wraps
Wrap and wrap and wrap and wrap, keeping everything snug by always pushing back towards the wrist you started from. Keep wrapping until you are snug against the second column. The area next to each wrist should be able to have one finger barely slide in.
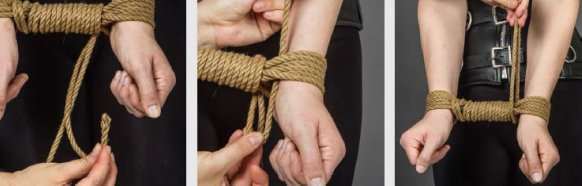
Split the ends and tuck one through
Split the two ends away from one another. Take one of the ends and tuck it in the gap between the wraps and the second column. Pull it all the way through the gap.
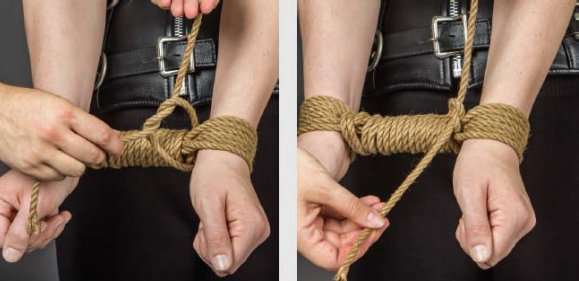
Tie a square knot
Using the ends, tie a square knot. Add an extra hitch if you are using a slippery line. If you are concerned with aesthetics, just tuck the loose ends of the line into open gaps. Have too much rope? Do a second layer of wraps!
The back side of the wraps should look like this when you’re finished. In this version, by struggling she loosened up the wrist wrap lines, but the space between wrists held tight, keeping her bound in the tie.