Double Coin Knot - bondage manual


articles and tutorials Bondage tutorials for beginners Rope bondage knots tutorial
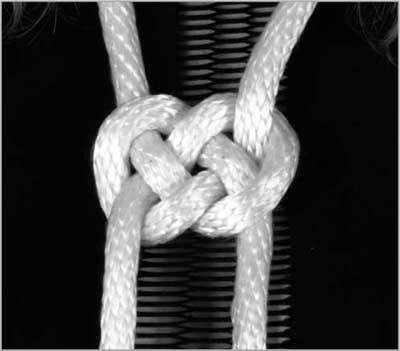
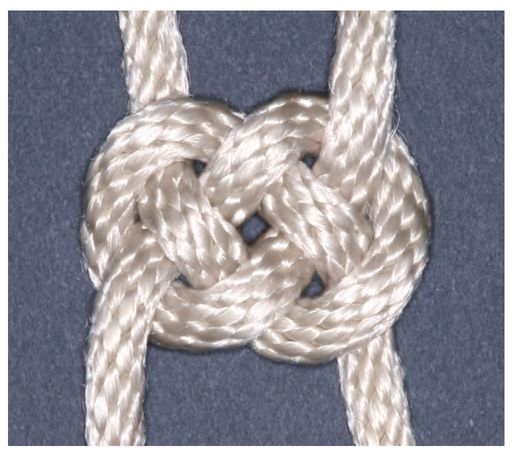
Here is our favorite knot! This Asian knot symbolizing prosperity has been used as a decorative knot for thousands of years. We like it because it presents potential loops on each corner where ropes can pass through, making it ideal as a central knot for an unlimited variety of rope harnesses. It’s also a flat knot that is comfortable to wear and lie upon. Plus it makes anyone look like a rope Master.
Rope length: Any length, from 1 to 100 feet
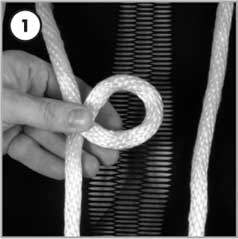
With the middle of the rope hanging around your partner’s neck, make a counter-clockwise P shape with the left rope. Make sure the bottom of the P is behind the top.
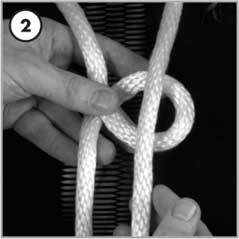
Keeping this loop open, place the right-hand rope over the P so it looks like a pencil in front of an eye.
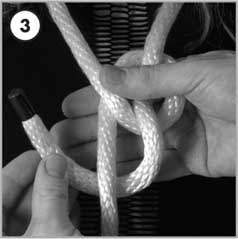
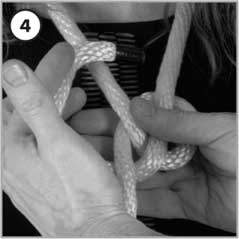
Transfer everything into your right hand, pinching the P together to maintain its shape. Now pass the right rope under (behind) the left rope.
Pass the same rope over (in front of) the upper left rope. (Make sure your right hand still maintains the shape of the pencil in front of the eye.)
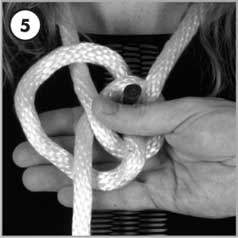
Lead this rope under the top of the P and out through the front.
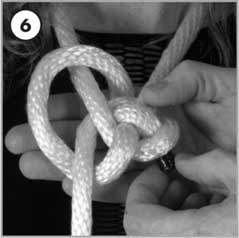
Now dive the rope over the “pencil” and down through the open loop on the lower right corner.
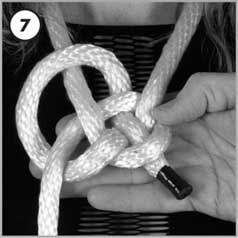
Finish pulling the rope under the lower right corner loop and continue pulling it through until the left-side loop closes to match the right.

Adjust the ropes carefully throughout the knot to make it symmetrical. Do NOT try to tighten the knot by pulling on both ropes or it will collapse.
How to tie a Double Coin Knot
This is our signature knot! We use it in more ties and in more ways than any other knot in this book. An Asian knot, it mimics the appearance of two antique Chinese coins overlapping. Merchants once believed the design of the knot brought prosperity and a prolonged life. Extremely versatile, the knot is the foundation of other knots and can be tied using doubled lines for a larger, more elaborate appearance. In all truth, a book could be written on just this knot and its myriad applications.
Rope length: Any length
Rope diameter: Any diameter
Start by making a counterclockwise loop with the left rope. Make sure the “leg” of the loop is behind the P shape you created.
Keeping the loop open, place the right rope over the P so it looks like a pencil in front of an eye.
Transfer everything into your right hand. Pinch the P together to maintain its shape. Create a bight in the right rope and pass it under (behind) the “leg” of the P.
Weave the bight over (in front of) the upper left rope. Make sure the right hand still holds the “pencil” rope in front of the “eye” loop.
Tuck the bight under the top of the P and out through the front.
Now dive the rope over the “pencil” and down through the open loop on the lower right corner. Finish the knot by pulling the bight’s rope entirely through the knot.
Adjust the ropes carefully throughout the knot to make sure it’s flat and looks symmetrical. Don’t try to tighten the knot by pulling on both ropes or it will collapse.

|
|

|