Bondage Knots: square knot | tutorial for beginners


articles and tutorials Bondage tutorials for beginners Rope bondage knots tutorial
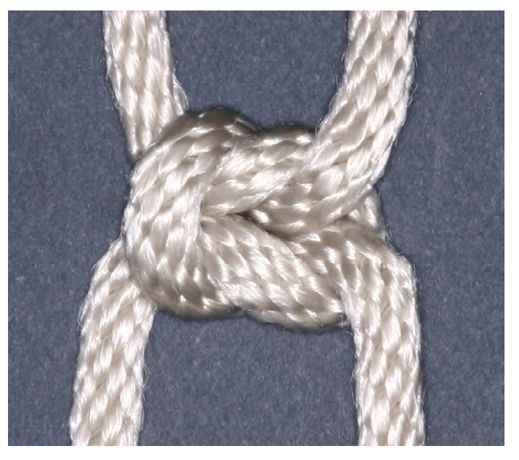
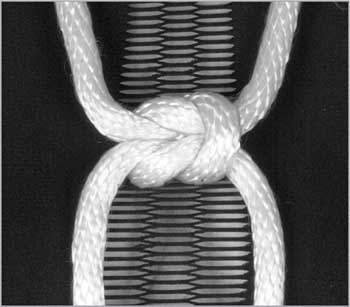
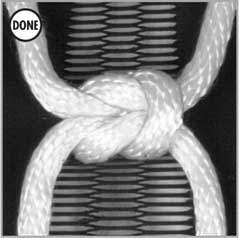
The square knot - twisted ends of rope forming a square shape
This is the most commonly used knot, useful for tying packages, the shoelaces, and your sub.
We will not use this knot for tying somebody directly, but it will be used for fastening other bindings. Even if everybody knows it, as many people does it wrong, we will explain it again.
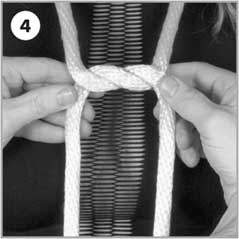
Twist one rope over the other (or one end of a rope over the other end of the same rope)
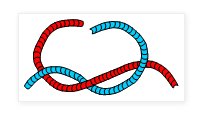
And then twist back, forming two interlaced loops.
This, as most knots, works because the rope passes twice by the same loop in opposite directions, and both segments are pressed one against the other when the loop tightens.
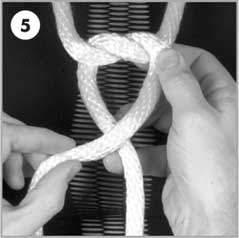
So, note the rope that leaves the lower twist on the upper side enters the upper twist also over (and not under) the other rope. (Follow the blue rope).
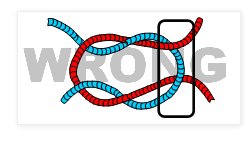
Be careful, because if you get that step wrong, you will finish just with two twisted ropes, not a knot. This one is called sometimes “granny’s knot” and it is no knot at all. It will slide until untying itself.
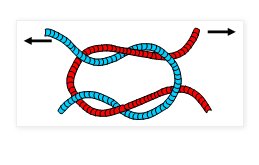
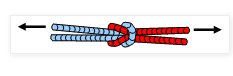
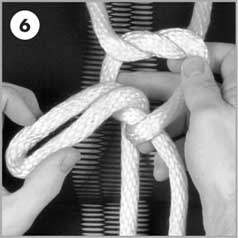
Tighten by pulling by the loose ends (and note how the loops tighten over two segments which run in opposite directions)
How to tie a square knot, variant 2
This essential knot is one of the most frequent you will tie. It’s quick. It’s easy to tighten for holding pieces securely. It’s also a flat knot that is comfortable against the skin. The drawbacks of this knot are that it can loosen when the ends are pulled, and it’s also easy to mis-tie into a granny knot, which looks similar but the ends come out perpendicular to the knot instead of parallel to each other, so it doesn’t lay flat.
Rope length: Any length
Rope diameter: Any diameter
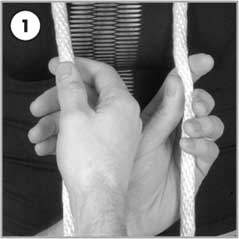
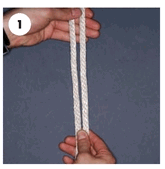
With two ropes hanging down, take the right rope in your left hand and the left rope in your right.
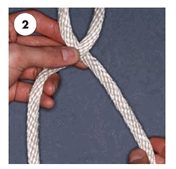
Cross the left rope over the right rope…
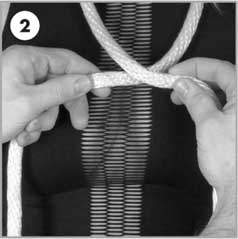
and wrap it under the right rope. Then pull the end all the way over the top.
(You’re halfway there!) Again you have two ropes hanging down.
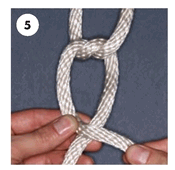
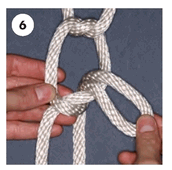
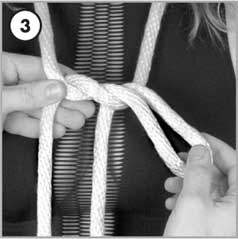
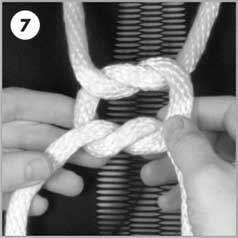
Now cross the RIGHT rope over the left rope.
Pull it under and through.
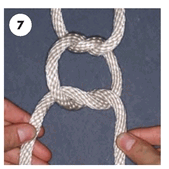
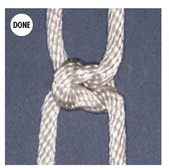
Now tighten the knot by pulling the ends. A common mantra for tying the square knot is: “Left over right and under; right over left and under.”
You know you’ve tied it correctly if both ropes on each side of the knot come out together or parallel. If you’ve mis-tied it, simply back up halfway and wrap the ends opposite the way you did.
Square knot, detailed manual 3