Ceiling Suspension Point - Lift Box Approach - BDSM furniture Workshop


articles and tutorials BDSM workshop
Here is a method of installing a ceiling suspension point that provides some clearance above the ceiling surface itself. I used this method in my current home. It allowed me to save all 10 feet of ceiling height as useable, instead of losing 10" to the height of my chain hoist. This project refers specifically to my ceiling, but should be adaptable with little extra effort.
If you missed the first approach I describe, the link below will take you to the Reinforced Joists Approach.
Reinforced Joist Approach
Difficulty: Low
Special Tools and Materials
Wallboard saw (razor cutter will do in a pinch), air return duct approximately 12" x 12".
Steps
Know Thy Ceiling
Every ceiling is a bit different, and you'll need to examine yours closely. I assume you can get up there, uncomfortable though that may be. The plan that follows has these characteristics in mind, based on my own ceiling:
- Joist centers are 24" apart. Some houses are built with 16" centers. If this is the case, you can redesign with smaller dimensions.
- Joists are 2x6s. Many houses have 2x4 joists. Given the recent construction of mine, I was surprised to find excellent 2x6s in place. If you have 2x4s, check the span... the distance between solid supports from below. Short spans and 2x4s are quite adequate. You might try the bounce test, no matter what lumber you're working with. Slowly shift all of your weight onto each joist individually. Listen for cracking or groaning, and watch for noticable bowing. See any of these things = get the hell off. If you can bounce lightly on each individual joist without a heart attack, they should be fine. Of course, this is not a guarantee!
- Your ceiling is surfaced with wallboard, not slats/plaster. If your house is quite old and hasn't ever been remodeled, you might have slat walls. Screwing with them will create a major headache.
Pick Your Spot
This may be the most important step. Once you start cutting, your suspension point location isn't going to change. In addition to being useful from below, your spot should be roughly centered between two joists. Locations near a wall (interior or exterior) provide more natural strength.
Mark your spot. Poke a hole through the ceiling to make sure you're in the right place, and that this place isn't too close to any joists.
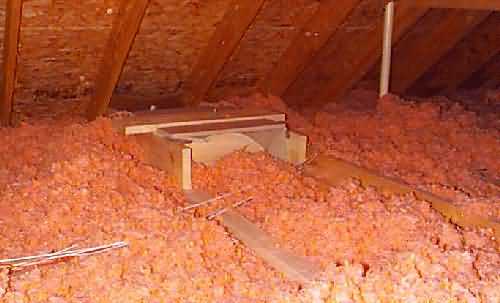
My spot was dictated by the layout of the second floor. I wanted the point in my walk-in closet/playroom, and only one area had the space. I found this location from above, and examined the vicinity. Because it was near an outside wall, I was only going to be crossing three joists but could tie in to a pair of rafters as well. My area looked something like this:
The rafters at right are 2x12 on 24" centers. The three joists in play are 2x6 on 24" centers. The header is comprised of a 2x4 flat across the joists and a 2x6 on edge nailed to it. This header runs the length of the house. The large black dot is about where I need the suspension point to end up.
Plan the Lift Box
The basic idea here is to build a box sitting atop the joists. This box will have two long sides perpendicular to the joists, connected by two short sides parallel to the joists. You're going to build this box of 2x stock at least 6" high, but higher if you need more clearance.
The header, specifically the 2x4 of the header, was in my way. I chose to built the lift box on top of this piece. This approach meant that side would be 1.5" above the joist, so I needed to run a matching 2x4 under the opposite side of the box. Here is a diagram of the box I built, with the existing wood greyed out:
Except for the board marked as a 2x4, all of the new construction so far is of 2x8. This means the top of the lift box is a bit over 14" above the surface of the ceiling... 5.5" joist, 1.5" header, 7.25" box.
Plan the Suspension Beam
The suspension point itself is secured to a beam that rests securely atop the lift box. I used a length of 2x12, backed up by a piece of 2x8. These two boards are screwed and glued together, and sized so that the 2x8 sits inside the lift box, preventing either end of the 2x12 from sliding off the box. For maximum strength, I left the 2x12 long so that a couple inches hang off each side of the lift box. The beam:
Build It
For me, this meant cutting to size and packing pieces and tools two floors up into the attic to assemble in-place. I used drywall screws and a number of pre-fab steel brackets (Simpson Strap-Tie, available at any hardware store) to put things together. The order of this process follows in brief, with near/far/left/right refering to the relative position in diagrams above.
1. Screw 2x4 to near 2x8 box side, after positioning it to extend across third joist. Extra 2x4 should hang into the box, providing a ledge for the left and right box sides.
2. Screw far 2x8 box side atop existing header 2x4, using strap-ties.
3. Screw near side assembly to joists (3) and rafter. Use left and right box sides to position this the correct distance from far box side.
4. Secure left and right box sides using screws, joist hangers, and corner brackets. Rely on corner brackets to square this box.
5. At this point, cut a square out of your ceiling around the hole you poked earlier. You may want to undersize this hole for now, enlarging it later to fit an air register (see 9 below) or other concealment. If noise is a concern, insulate the box sides at this time as well. I used foam board and carpet, tacked in place.
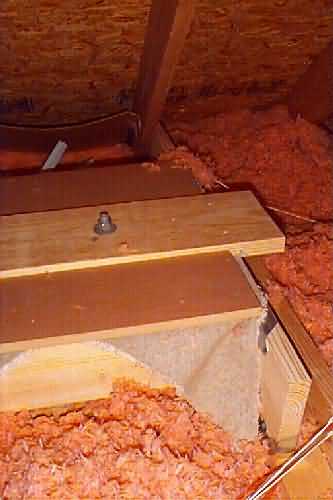
6. Assemble the suspension beam, locking a forged eyebolt in place appropriately. Secure the beam in place across the near and far box sides with screws. I also screwed down the 2x8 underneath this beam using angle brackets.
7. Cover up the rest of the box to prevent drafts from the attic. I tacked down more carpet for sound and temperature insulation, then nailed on scrap wood.
8. Redistribute attic insulation over the finished box, hang your hoist or other lifting device, and go to town!
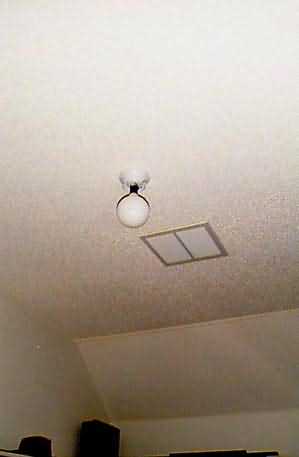
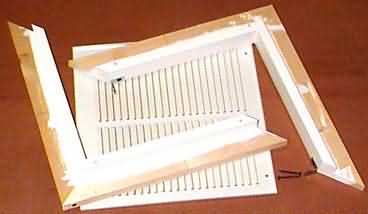
9. If you want to be able to conceal the big new hole in your ceiling, I have just the thing. Head to a home improvement center and find an air return vent. Paint to match the air registers in your home. Build a simple 1xX frame to fit inside the register and mout it in the up-sized hole in the ceiling. In the picture below, the vent cover is 13"x13". The frame is built in two pieces that screw together, and is painted to match the ceiling.
Finished Pics
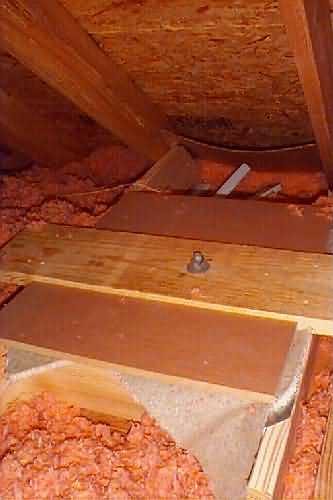
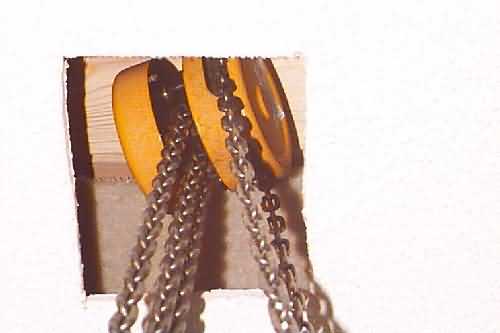
Here is the chain hoist hanging from the suspension point. This picture was taken through the undersized hole cut in step 5 above.
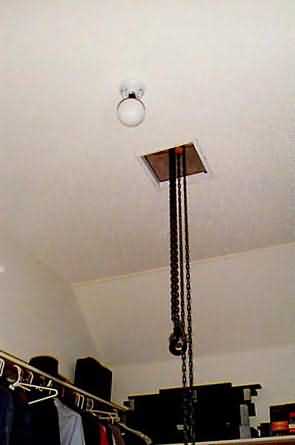
Taken from the closet entryway, this picture shows the hoist hanging through the finished hole. Note the wood frame secured in place.
Finally, the concealed view. The air register has been screwed on, after removing the hoist. Nothing suspicious here...