Rope bindings: limbs crossed | tutorial for beginners


articles and tutorials Bondage tutorials for beginners Rope bondage
Typically used for binding your subs hands at the back, but it can be used with the hands at the front, and for tying the ankles, for keeping the legs opened, knees apart.
This binding takes about 8 feet (2.44 m), with a 5/16 (8mm) rope (it would take a little less with a smaller diameter rope)
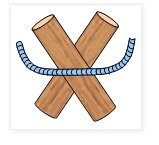
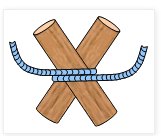
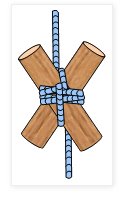
With the limbs crossed, begin by resting the center of the rope against your sub's limbs
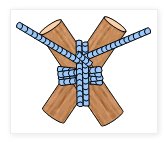
And coil the rope around the limbs three or four times (more for a thin rope, less for a thick one).
Several coils help spread the rope’s pressure on more surface of the skin, lessening the possible damage.
The coil doesn’t need to be too tight.
After you coiled it enough times, cross the ends of the ropes. The one that will go down passes over the one that will go up.
This step is needed for changing the direction on the rope without pinching or putting undue pressure on the limbs.
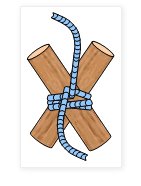
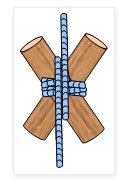
And then coil a couple of times up and down, passing the rope between the limbs, vertically.
It is not necessary for the coils to be too tight. Is the looping around the limbs crossways, not the tightness of the ropes, what makes the bind secure (within reason).
And then coil a couple of times up and down, passing the rope between the limbs, vertically.
Again, it is not necessary for the coils to be too tight. Is the looping around the limbs crossways, not the tightness of the ropes, what makes the bind secure (within reason).
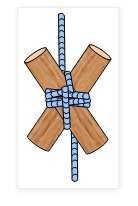
Finally finish the binding by tying both ends of the rope with a square knot.
Check that you can pass at least a finger between the ropes and the skin. If you can’t, loosen the binding.